How to Make the Most out of Your Laptop as a Student
The rapid boom in online classes and courses made it essential for every student to own a laptop or a PC. As per stats, around 95 percent of undergraduate students in the United States own a laptop. Even after having powerful machines in their hands, most students are unaware of how to make the most of their laptops.
In this article, we have shared the top 8 ways to improve your productivity as a student using your laptop.
1. Say Hi! to Productivity Tools
Productivity tools aren’t meant just for professionals, you can also use them to improve your productivity as a student. These tools include reminders, calendars, and other applications that can help you keep track of your schedule.
Install these applications and tools on your laptop, and you will have everything in one place. We also recommend installing ad-blockers as they will help you maintain focus while browsing, and those unwanted ads won’t disturb you during the class.
2. Avoid Installing Distracting Apps
Modern laptops have plenty of storage space, and that’s why most students install numerous apps on their computers. However, in order to make the most out of your computer, you need to keep it free from distracting apps.
Uninstall all applications that you do not use and are not helpful to you for anything. A clean laptop runs much more efficiently, so there will be fewer lags, and you will get better performance.
Do not forget the extra space you get by deleting unwanted apps! You can utilize this space to store the recorded classes and other essential files.
3. Learn How to Take Notes Effectively
Much of the criticism of laptops for students pertain to note-taking. While most students believe that writing notes by hand is the best way, typing them on your laptop is better, as per experts.
When you take notes using your laptops, you don’t have to be selective since you can write fast. Install applications such as MS Word and Grammarly to ensure you can take notes quickly without making any mistakes.
Also, sharing these notes is easy, and you can have them on any device you own, such as your smartphone.
4. Have Shortcuts to Important Apps for Ease Access
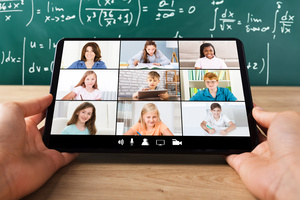
Nowadays, students have to attend multiple online classes in a day, which calls for the need for applications like Zoom. Searching for the app on your laptop may not be that convenient, so having its shortcut will simplify things for you.
Similarly, organize all shortcuts in one place so that you can launch the app you want. You can even create shortcuts based on the lectures to save your precious time.
5. Clean Up and Organize Your Laptop
As kids, we all had a computer with a messy desktop, and finding an app to launch was a task back then. However, this should not persist now, and if you are doing this, it’s time to put a full stop.
Cleaning a laptop is one of the most important tasks every student should do to ensure proper usage. By cleaning, we mean removing the files that you do not use anymore. Also, you should organize the PC to ensure that you don’t have to find the programs you want to launch.
Everything from the recorded classes to the applications should be readily accessible.
6. Install All Apps Required in the Class
While opting for most courses, you’ll come to know about the laptop configurations required to enroll in them. Similarly, you can find information on the apps and tools required for a class.
For example, in a drawing class, you will need MS Paint and other apps that help you paint. Having these apps already installed on your laptop saves precious time, and you can keep up with what the tutor is teaching.
A Pro Tip
Make sure to update these apps to the latest version to avoid technical glitches and bugs.
7. Always Keep the Battery Charged Fully
Most students pay attention to the installed apps and the aesthetics of the laptop. However, the battery is its soul, and you should never ignore it. If you are studying from a classroom, you should keep the battery charged to 100% before you leave your house.
Imagine your laptop running out of charge when the teacher is explaining an important concept. Not every desk in the classroom has a charging port, so keeping your laptop’s battery full every time is important.
8. Always Create a Backup of the Essential Files
Another hack for students to make the most out of their laptops is creating backups of the essential files. Always create a backup of those recorded class videos and notes to ensure that you do not lose important data if your laptop gets damaged or in the event of any other unforeseen event.
Save the backups somewhere else, for example, in an external drive or on cloud storage, to have access to it at all times.
Closing Thoughts
We hope these eight ways will help you be more productive and get the most out of your laptop as a student. Always choose a laptop that meets your needs and has the right configuration depending on your course or class’s needs.
Here’s some detailed information on which is the best laptop configuration for students in case you need some help in choosing a machine.
Lastly, don’t forget to install a reliable antivirus since students usually connect to external wireless networks, so safety is a must for improved productivity.