Education, Parenting, Internet Safety for All Bookmark
SAFE SEARCH
SAFE IMAGES
SAFE WIKI
SAFE VIDEOS
Enhanced by Google
Enhanced by Google
Enhanced by Google
Enhanced by Google
Category: Parenting
Before You Share: A Practical Photo Privacy Plan for Preschool Families
A photo of a child’s first painting or a new friendship can feel too lovely to keep to yourself. Yet a quick post can reveal more than you expect. A simple family photo plan helps you celebrate the moment while giving young children more privacy and a growing say in what happens to their image, now and as they grow.
Start with a conversation, not a checklist
Preschoolers may not understand every consequence of an online post, but they can begin to understand that their image belongs to them. Ask, ‘Is it okay if I take this?’ and explain what you plan to do with the picture. If your child says no or turns away, respect that answer when practical.
You can also tell family members what you would like them to do. A useful rule is to ask a parent before posting any child’s photo and to check with the child too. Make room for relatives who live far away: a private call or a small shared album can still help them feel connected.
Look beyond the smiling face
Before sharing, scan the whole image. A uniform, name badge, street sign or familiar routine can reveal where a child spends their time. The background may also contain another child whose family has made a different decision about sharing.
Avoid adding full names, dates of birth, addresses or live location details to captions. Check whether your phone adds location information to photos and remove it where possible. Remember that even a restricted audience can save or screenshot an image; privacy settings reduce exposure but do not guarantee control.
The eSafety Commissioner’s privacy advice for parents explains how images can disclose personal details and why it pays to pause before posting.
Ask the early learning service how images are handled
Photos can give families a window into a child’s day and help educators document learning. Before agreeing to image use, ask what is photographed, why it is needed, who can see it and where it is stored. Find out whether consent for a secure family app is separate from consent for a public website or social media.
If you are considering an early learning centre, or a service elsewhere, ask to see its current image and privacy policies. What happens when a child appears in the background of a group photo? How can a family change its preferences? How long are images kept after a child leaves?
The national early childhood regulator’s guide to personal information outlines risks and safeguards services can consider. Policies and legal requirements can change, so ask the service how its current procedures apply to your family.
Choose a smaller audience on purpose
A closed family group may be more appropriate than a public post, but check who belongs to it and whether members can invite others. Use unique passwords and multi-factor authentication where available. Review access when a relative changes devices or a family situation changes.
For especially personal moments, consider sharing the story instead of the image: ‘She made a huge paper rocket today!’ You might photograph the artwork by itself or crop an image so the child is not identifiable. These choices are not about hiding childhood; they give families options.
Practise consent through everyday play
Make privacy a small, ordinary habit. Let your child take a photo of a toy, then ask whether the toy wants its picture shared. Model asking a sibling before taking theirs. If a child changes their mind about a photo you control, delete it or explain what you can and cannot remove.
Avoid promising that everything online can be erased. Instead, show children that adults can listen, make careful choices and fix what they reasonably can. Keep the conversation light and age-appropriate rather than making the internet sound frightening.
Review your family plan together
Once or twice a year, check old albums, app permissions and your sharing settings. Ask caregivers about any changes to their processes. A new phone, a new preschool room or a change in family circumstances is a good reason to revisit your choices.
A family agreement does not need to be complicated. Decide which moments stay completely private, who can receive pictures and whether relatives may share them again. Write those choices down so a babysitter or grandparent can follow them too. If a photo is shared accidentally, ask for it to be removed promptly and talk calmly about how to prevent the same mistake next time.
There is no single rule that suits every family. The goal is to make sharing deliberate: protect identifying details, understand who can access each image and give children a voice as they grow. Those small habits make it easier to enjoy the memories without sharing more than you intended.
Choosing a Safe Spot for Your Toddler’s First Balance Bike Rides
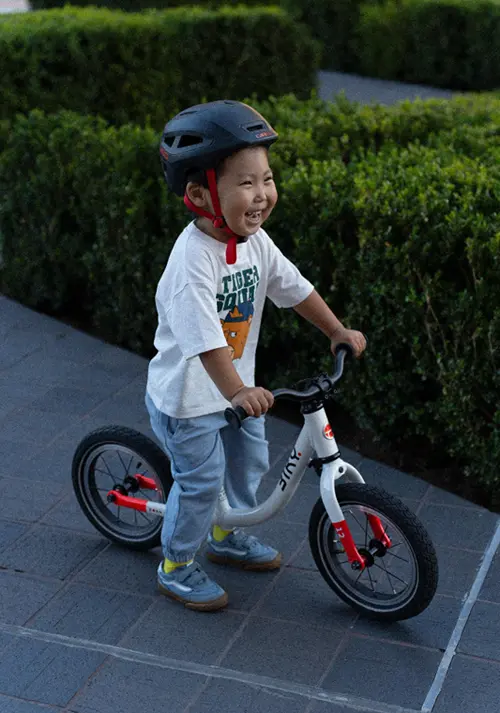
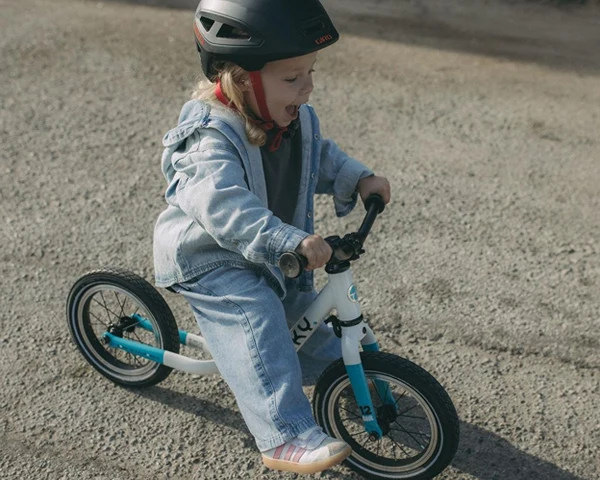
Hardly anyone thinks about pavement texture the first time a toddler pushes off on a balance bike. Parents are watching for wobbles, not slope. But where that first ride happens does more to decide whether the excitement lasts than the bike itself does, and one bad surface can make a confident two-year-old bike-shy.
A patch of loose gravel, a driveway with cars backing in and out, or a slope that’s just a little too steep can undo a whole afternoon. This guide covers the three things that can’t be separated: the location, the gear, and the bike’s fit. Skip any one, and the other two matter less.
Is a Toddler Actually Ready to Start?
Age is a rough guide at best: some toddlers are ready at 15 months, others closer to three. A few signs matter more than a birthday:
Can stand unsupported for a few seconds without holding onto furniture or a parent’s hand.
Shows real interest in the bike itself – climbing on it, pushing it around the living room, asking to go outside with it.
Can follow one simple instruction (“stop,” “wait”) most of the time, even if not perfectly.
Is comfortable being outside off-leash or on a stroller strap, at least in a fenced or enclosed space.
Most kids show more than one of these signs well before they show all of them, and that’s normal. These don’t all need to line up at once, either – a toddler who isn’t quite there yet doesn’t need to wait for a milestone chart. A few short indoor sessions standing over the frame, with no pressure to actually ride, tend to answer the readiness question faster than watching for a specific age.
Toddler Balance Bike Safety Starts With the Right Setting
A balance bike skips pedals and brakes entirely, and gears never enter the picture either: the child alone controls speed and direction. That’s exactly why balance bikes work so well for learning to steer and lean before pedaling enters the picture. It’s also why the setting has to do more of the safety work than it would for an older kid on a bigger bike: at walking pace, a toddler doesn’t yet have the reflexes to correct for a surface problem the way a more experienced rider would, so the environment ends up compensating for a skill gap that hasn’t closed yet.
Pediatric guidance on bicycle safety consistently emphasizes a point that surprises many parents: many injuries occur in driveways, on sidewalks, and on shared bike paths, not on busy streets. That tracks: a driveway is only as safe as its sightlines and its traffic pattern, and a sidewalk is only as safe as its surface and its crossings. Shared paths add another variable: other kids on bikes and scooters, all moving at their own pace and not always paying attention to a much smaller rider nearby.
What Actually Makes a Surface Safe – and Why
Not every paved area is created equal, and the reasons come down to physics as much as common sense. A balance bike has no freewheel and no momentum to speak of at toddler speed, so anything that interrupts the front wheel’s contact with the ground gets amplified rather than absorbed:
Flat and even. A slope an adult wouldn’t register can drift a two-year-old toward a curb or a parked car, because there’s no braking system to correct course; steering is the only tool available, and steering takes longer to learn than balance does.
Free of loose material. Gravel, sand, wet leaves, and standing water all reduce the front wheel’s grip, so it can turn without the bike turning.
Wide enough to wobble in. Young riders steer in broad, uneven arcs before they steer in straight lines, so a narrow sidewalk or path leaves no margin for the arc itself.
Free of steep grades. With no brake, any real downhill turns “ride” into “roll,” and speed builds faster than a toddler can process.
Open water (a pool, pond, or drainage ditch near the practice area) is a separate category of risk from surface quality. It deserves its own rule rather than getting folded into “avoid it if the ground looks bad”: treat any body of water as an automatic boundary line, regardless of how flat and dry the pavement around it looks.
Why Balance Bikes Work Before Pedals Do
Skipping training wheels for a balance bike isn’t just a trend: it changes what a child practices first. A bike with pedals asks a child to juggle pedaling and steering while also keeping their balance; a balance bike removes pedaling from the equation entirely, so kids learn to steer and lean with both feet available as a safety net, and only add pedaling once that instinct is already there. That sequencing is a big part of why, once a child is ready, the switch to a pedal bike often takes only five to ten minutes rather than weeks of relearning.
For kids specifically, the low seat height and simple frame mean falls happen from a shorter distance and at a slower speed than on a bike with training wheels, which tend to tip sideways rather than settle down onto both feet. A young rider on a balance bike can put a foot down at the first sign of trouble instead of waiting for a wheel to catch or a pedal to jam; a difference that makes watching parents noticeably less anxious once they’ve seen it happen a few times.
None of this makes a balance bike foolproof, and kids still fall the way any beginner on any bicycle does. What it does is shift most of the actual risk back onto the same three factors the rest of this guide covers: the surface a child rides on, the gear they’re wearing, and how well the bike itself fits.
Driveway, Sidewalk, or Bike Park? Comparing Common First-Ride Locations
Not every family has a bike park or a quiet cul-de-sac nearby. Here’s how the realistic options tend to compare:
Location
Surface
Traffic Exposure
Room to Roam
Best Suited For
Home driveway
Usually smooth, but often sloped
Low, but not zero (reversing cars)
Narrow
Very first sessions, adult standing at the street end
Quiet cul-de-sac
Smooth pavement
Low
Wide
Early sessions once basic steering is there
Sidewalk (residential)
Smooth, interrupted by curb cuts
Low to moderate (pedestrians, crossings)
Narrow to moderate
Once steering is reliable enough to hold a line
Bike park or paved trail
Even to moderate
Low to moderate (other riders)
Wide
Building confidence over longer stretches
Empty parking lot (off hours)
Very smooth
Low, if truly empty
Very wide
Practicing turns and stops with no curbs
Grass lawn
Uneven, slower rolling
None
Depends on yard size
Very cautious first-timers (see below)
Families without a driveway or yard aren’t out of options. A quiet stretch of sidewalk at a low-traffic time of day, an empty section of a school parking lot on a weekend, or a covered mall walkway before opening hours can all work; the criteria above (flat, clear, wide, low-traffic) matter more than which category of location they happen to fall into.
Common Mistakes During Practice Rides
A few patterns show up often enough among kids at this age to call out directly:
Starting on a hill “because it’s more exciting.” Momentum without brakes is the opposite of confidence-building for a first-timer.
Skipping the hazard sweep. A hose, a forgotten toy, or a pet in the path causes more falls than bad pavement does.
Reusing a hand-me-down helmet. A helmet that “fits” an older sibling was built for a different head-injury pattern. See the helmet section below.
Buying a bike “so it lasts longer.” A frame that’s too big or too heavy undoes almost everything else on this list; fit matters more than growing room.
The Safety Gear That Actually Matters at This Age
A helmet is the one non-negotiable piece, covered in more detail further down. A few other items matter specifically because of how kids fall at this age: not fast, but often, and usually sideways or forward onto outstretched hands.
Elbow and knee pads absorb the scrapes that come from exactly that kind of low-speed tip-over; they’re a minor daily hassle worth keeping. Closed-toe shoes matter for the same reason sandals don’t: a toddler’s foot is close to the ground and close to the front wheel, and bare toes or open sandals take the brunt of a stub or scrape that sneakers would deflect. Bright clothing is a minor but real factor: a low-to-the-ground rider in muted colors is genuinely harder for a reversing driver or another cyclist to spot than the height difference alone would suggest.
Give the Bicycle Itself a Quick Check
A child’s safety also depends on the bicycle holding together the way it’s supposed to. When buying, check ASTM F963 (the toy-safety specification covering ride-on toys), since it specifically tests for sharp edges, fastener risk, and tip-over resistance rather than just general build quality. As of August 2026, that’s a reasonable baseline for judging any bicycle in this category.
Beyond the standard itself, a short physical check before rides catches the problems a standard can’t, and kids often enjoy helping with it once they’re old enough to hold the pump:
No sharp edges or exposed bolts on the frame, fork, or seat clamp.
Tires free of cracks, with air-filled tires properly inflated.
Saddle and handlebars locked firmly – a firm twist by hand should reveal any slippage before a ride does.
No bolts that have worked loose since the last ride.
It’s worth checking the official CPSC recall database occasionally for open recalls on a specific model, particularly for a secondhand or hand-me-down bike whose history isn’t fully known.
Choosing a Balance Bike: Seat Height, Fit, and How Much It Weighs
Fit starts with the seat. At its lowest setting, a child should be able to sit with both feet flat on the ground (not on tiptoe) since that’s what lets them push off and catch themselves without stretching. As a rule of thumb, seat height should be at or just below inseam length, and an adjustable seatpost buys a season or two of extra use as a child grows.
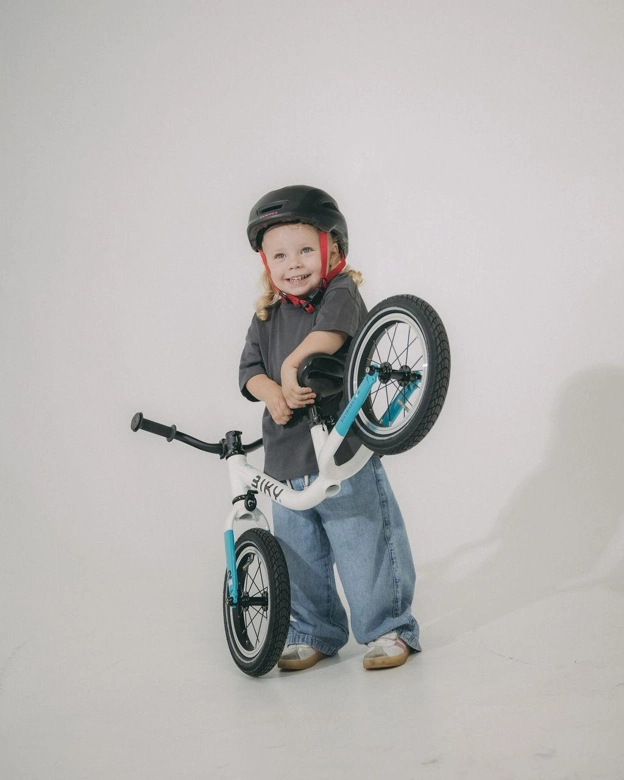
Weight matters just as much as height. Many pediatric cycling guides lean on a rough rule that a balance bike shouldn’t be heavier than about 30% of a child’s body weight – past that point, a toddler starts wrestling with the bike rather than riding it, which slows down the balance-and-confidence progress the bike is supposed to build. A 6.4 lb frame (how much the Biky 12 itself actually weighs, verified against its product listing as of this writing) stays comfortably under that threshold for most children in its stated 1.5–4-year range. In contrast, a bulkier steel-frame bike closer to 10 lb often won’t.
A well-sized 12-inch balance bike with a low step-through frame and a built-in steering limiter gives young riders enough control to handle a bumpy seam or a tight corner without the front wheel jackknifing out from under them. A bicycle that’s too heavy or too tall undoes much of the careful location scouting above, since the child ends up fighting the bike instead of reading the surface; age and inseam matter here more than a birthday alone would suggest. Kids grow fast at this age, so it’s worth rechecking seat height every couple of months rather than assuming last season’s setting still fits.
Two smaller details are worth checking too. Air-filled tires cushion small bumps better than solid foam tires, which stay puncture-proof but transmit more of the terrain straight into small hands. And while a hand brake isn’t necessary in the first weeks, it’s a genuinely useful feature for an older toddler getting ready to move toward a pedal bicycle, since practicing the motion now makes the eventual switch easier.
How Other Popular Balance Bikes Compare
The Biky 12 isn’t the only balance bike built around a lightweight, low-step-through design. The figures below come from each brand’s own current product listing where noted; a few are drawn from secondary retailer listings rather than the manufacturer directly, which is worth confirming before treating any single number as final.
Child-specific hand brake and steering limiter on a very light aluminum frame
Prevelo Alpha Zero
18 months and up (retailer listing – confirm with manufacturer)
Aluminum frame aimed at active riders
Strider Sport
About 18 months–4 years (retailer listing – confirm with manufacturer)
Tool-free footrest, padded seat
Kinderkraft Minibi
From about 12 months (retailer listing – confirm with manufacturer)
Among the lightest frames in this category
Trybike Steel 2-in-1
About 15 months, with a trike conversion kit extending use further (confirm exact range with manufacturer)
Converts between a balance bike and a trike
Hape New Explorer
About 3–5 years (retailer listing – confirm with manufacturer)
Magnesium frame aimed at more confident, slightly older riders
Any of these can work well for a toddler: the real differences show up in weight, adjustability, and small features like a hand brake, not in safety.
Supervision That Changes With the Location
How closely you stay by a child’s side should shift with where you are, not stay fixed out of habit, because the actual risk changes with the setting, not just the child’s skill level.
Driveways, cul-de-sacs, and park paths: walk or jog alongside, close enough to step in immediately near any point where the path meets a street.
Enclosed, hazard-free backyards: once basic control shows up, it’s fine to hang back a few steps rather than shadow every wobble; the lower risk of the setting is what earns the extra distance, not the child’s age.
Anywhere with other kids, pedestrians, or cyclists: stay within arm’s reach until a child reliably stops or steers around people.
Kids read parental tension surprisingly well, so staying relaxed while staying close does more good than hovering anxiously. Teaching the actual stopping mechanic early pays off across every one of these settings: a child should learn to slow down and plant both feet on the ground rather than aiming for a fence or a parent to grab onto. “Stop with your feet” is a simpler instruction than it sounds, and it works well before there’s any real speed involved to make it harder.
Helmet Fit: A Few Details Worth Knowing
Two facts get missed more often than they should:
CPSC’s bicycle helmet standard requires helmets for children under five to carry an “Extended Head Coverage” label, meaning they’re built to protect more of the head than a standard helmet for an older child or adult, because the most vulnerable areas sit in different places on a younger skull. A helmet handed down from an older sibling doesn’t meet this bar, even if it physically fits.
A properly fitted helmet sits level and covers the forehead (not tipped back), with the chin strap snug enough to leave about two finger-widths of space. Worth checking every ride, not just the first, since fit shifts as kids grow.
An Alternative Take: Starting on Grass Instead of Pavement
Not every experienced parent or cycling instructor agrees that pavement is the best place to start, and this is the one place in this guide where reasonable people genuinely disagree.
The case for grass: it naturally slows a bike down and cushions falls, which removes the “the bike is running away from me” feeling that smooth pavement can trigger in a nervous first-timer. The cost is a slower path to the actual glide-and-balance sensation kids eventually need, since grass’s resistance masks the feedback a bike gives on a harder surface. In practice, that usually means a session or two on grass to build comfort, then a move to pavement once the flinching stops. A naturally fearless toddler often does better skipping grass entirely, since there’s less resistance to unlearn later; pavement gives immediate, honest feedback that grass doesn’t.
There’s no universal answer here. The right starting surface depends more on a child’s temperament than on any single rule, and that’s a rare thing for a safety guide to admit outright.
Quick Answers
How old should a toddler be to start a balance bike? Most start somewhere between 15 months and 2 years, but readiness signals (see above) matter more than the number on a calendar.
Is a helmet legally required for a balance bike? Requirements vary from place to place and change over time – check current local rules rather than relying on a general answer. Still, every pediatric safety source agrees a helmet belongs on regardless of what’s legally mandated.
How long do kids usually stay on a balance bike before moving to pedals? Typically one to two and a half years, with the switch itself often taking just five to ten minutes once balance is already there.
Grass or pavement for the very first ride? Either can work: see the section above. Cautious toddlers tend to do better starting on grass; fearless ones often do better skipping straight to pavement.
Before You Head Outside: The Checklist
Surface is flat and dry, clear of loose gravel or forgotten toys, and nowhere near open water.
Riding boundaries are marked; pets and younger siblings are out of the lane.
Helmet sits level and covers the forehead, with two finger widths of space under the chinstrap.
Closed-toe shoes and pads are on.
The bike fits – feet flat at the lowest seat height, no loose bolts, tires inflated, saddle and handlebars locked tight.
An adult’s position matches how enclosed and hazard-free the space actually is.
None of this needs to be perfect. Most kids don’t need a flawless setup; they need a reasonably safe one and a parent who’s paying attention. A driveway with a slight slope or a sidewalk with the occasional dog walker isn’t disqualifying; it just changes how closely you stand. The goal isn’t a flawless location; it’s one where a child can fall, laugh it off, and get back on.
Simple Safety Habits That Help Keep Kids Protected Every Day
Parents spend a lot of time thinking about big dangers, but ordinary moments often carry the most risk. A toddler climbing a bookshelf, a child running across a wet floor, or a teenager riding a bike without a helmet can all turn a normal afternoon into an emergency. The good news is that a few consistent habits go a long way toward lowering those risks.
Here is a practical guide to keeping children safer at home, on the move, and in the places they spend their time.
Start With a Safety Walk-Through at Home
Home is where children spend most of their time, so it is the best place to begin. Try walking through each room at your child’s eye level. Looking from a smaller person’s perspective helps you notice hazards you might otherwise miss. Pediatric injury prevention teams, like the one at Children’s Hospital Los Angeles, share guidelines for keeping your child safe at home that can help you spot problems many parents overlook.
Common areas to check include:
Stairs and windows: Use safety gates at the top and bottom of stairs for young children, and make sure window screens are not the only barrier. Screens are designed to keep insects out, not to stop a fall.
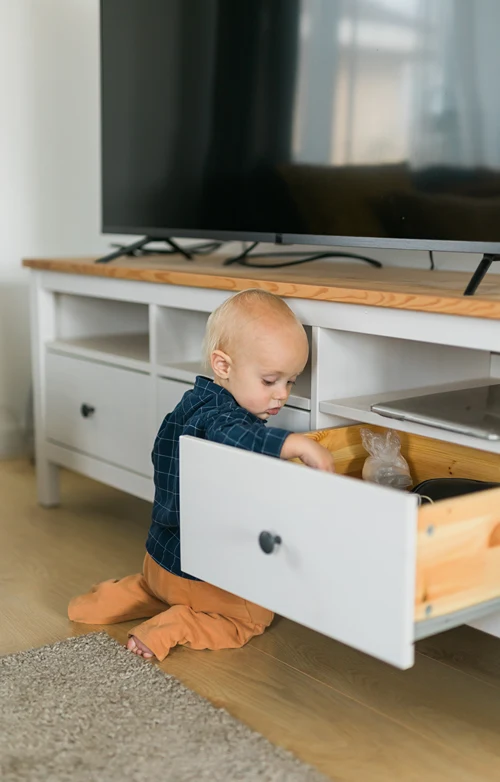
Furniture and TVs: Anchor dressers, bookcases and televisions to the wall so they cannot tip if a child climbs on them.
Cords and outlets: Cover unused outlets and keep blind cords out of reach, since dangling cords can be a strangulation hazard.
Cleaning products and medicine: Store them in high, locked cabinets, even if the packaging claims to be child-resistant.
Revisit this walk-through as your child grows. A home that was safe for a crawling baby needs different precautions once that baby becomes a curious climber.
Make Water and Kitchen Safety a Priority
Bathrooms and kitchens deserve special attention. Young children can get into trouble in very little water, so never leave them unattended in the bath, even for a moment to answer the door or the phone. Setting your home’s water heater to a safe temperature also helps prevent scalds, and this childproofing checklist for parents from Boston Children’s Hospital offers more room-by-room advice for infants, toddlers and older kids.
In the kitchen, turn pot handles inward, keep hot drinks away from table edges, and set a “no-kid zone” around the stove while you cook. Teach older children basic kitchen rules before letting them help, such as washing hands, using oven mitts, and asking before touching knives or hot appliances.
Build Safe Habits on the Road and on Wheels
Car seats, booster seats and seat belts are among the most effective tools parents have. Make sure your child’s seat suits their age, weight and height, is installed correctly, and is replaced if it has been in a crash. Many fire stations and community programs offer free car seat checks if you are unsure about your installation.
For kids on bikes, scooters and skateboards, a properly fitted helmet should be non-negotiable. Set the rule early and follow it yourself, because children copy what they see. Teach them to stop and look before crossing driveways, to stay visible with bright clothing, and to avoid wearing headphones while riding.
Talk About Playground and Sports Safety
Playgrounds are great for physical activity, but falls remain a common source of trouble. Look for soft surfacing such as wood chips, rubber mulch or sand beneath equipment, and check that structures are in good repair. Rust, loose bolts, broken parts or sharp edges are all signs to choose another spot and report the problem to the property owner.
In organized sports, make sure coaches enforce proper warm-ups, protective gear and rest periods. Encourage your child to speak up if something hurts rather than playing through pain. Teaching kids that it is okay to stop and tell an adult is one of the most useful safety lessons you can give them.
Supervision Still Matters Most
No checklist replaces attentive supervision. Younger children need an adult within arm’s reach around water, stairs, streets and playground equipment. Older children still benefit from check-ins, clear boundaries and an understanding of where they are and who they are with.
It also helps to create a family plan. Make sure your child knows their full name, your phone number, and what to do if they get separated from you in a store or at a crowded event. Fire preparedness belongs in that plan too, so map out two exits from every room, choose a meeting spot outside, and practice the route together. Rehearsing these scenarios calmly, almost like a game, helps kids remember them under stress.
Know What to Do When Something Goes Wrong
Even careful families face accidents. When something happens, the first priority is always your child’s health. Call emergency services for anything serious, and do not hesitate to take your child to the doctor even if the problem seems minor at first. Some issues, such as head trauma or internal injuries, may not show obvious symptoms right away.
Once your child is safe and receiving care, it is worth taking a few steps to document what happened. If a hazardous product, unsafe property, negligent driver or careless supervision played a role, details can matter later. Consider the following:
Write down what happened, when and where, while the details are fresh.
Take photos of the location, equipment or product involved.
Keep medical records, bills and follow-up instructions together.
Collect contact information for witnesses.
In more serious situations, many families also choose to speak with a legal professional who handles child injury cases to understand their options and protect their child’s rights. Medical costs, therapy and long-term care can add up quickly, and having guidance early can help families focus on recovery rather than paperwork. A consultation does not mean you must take legal action; it simply helps you understand where you stand.
Support Emotional Recovery Too
Physical healing is only part of the picture. After a frightening experience, children may feel anxious, have trouble sleeping, or avoid the place or activity connected to the incident. These reactions are common and understandable.
Listen without rushing them, and let them describe what they remember in their own words. Return to normal routines as soon as it is safe, and gently reintroduce activities at a pace your child can handle. If fear or behavior changes continue, a pediatrician or child counselor can offer extra support.
Safety Is a Habit, Not a One-Time Task
Keeping kids safe does not require perfection or constant worry. It comes from small, repeated choices: securing the furniture, buckling the seat belt, wearing the helmet, checking the playground, and keeping an eye on little ones. Pair those habits with open conversations, and your children will learn to recognize risks themselves.
As kids grow, gradually hand them more responsibility. Praise them when they make safe choices, explain the reasons behind your rules, and keep the lines of communication open. The more your child understands why safety matters, the more likely they are to carry those habits into adulthood.
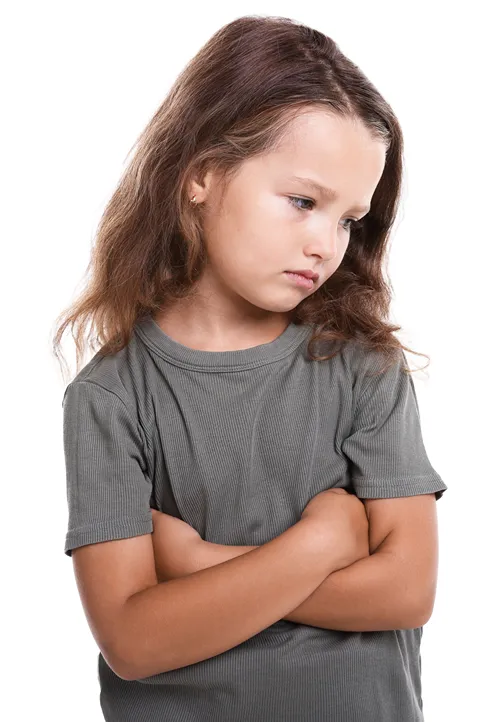
Kids experience stress just like adults do, but they don’t always know how to express what they’re feeling. School assignments, friendships, and everyday challenges can sometimes leave children feeling overwhelmed. Here are tips for recognizing when changes in mood or daily habits may signal a child is experiencing stress.
Increased Irritability or Mood Swings
Stress doesn’t always look like worry. Some children become unusually impatient or sensitive to criticism, even when they’re typically easygoing. Minor disappointments might suddenly trigger emotional outbursts that seem out of character.
If you notice these changes, consider what’s happening around your child. Perhaps they’re struggling with friendships or adjusting to a new routine. Identifying patterns can offer clues about what’s contributing to their frustration.
Changes in Sleep Patterns
Stress can disrupt even the most consistent bedtime routines. Your child might struggle to fall asleep because they’re thinking about tomorrow’s activities or worrying about something that happened earlier. Others may wake frequently during the night or experience nightmares.
An occasional restless night usually isn’t cause for concern. However, ongoing sleep difficulties can affect your child’s energy, mood, and ability to concentrate. Watch for whether their sleep problems coincide with stressful events or changes at school.
Creating a Calmer Bedtime Routine
A predictable evening routine can help children unwind after a stressful day. Try setting aside time for quiet activities, such as reading together, and limit screen use before bed. If your child tends to worry at night, encourage them to share their concerns earlier in the evening rather than waiting until bedtime. A consistent sleep schedule can also help them settle down and get adequate rest.
Unexplained Physical Complaints
Children don’t always have the words to describe emotional stress. Instead, their worries may show up as physical discomfort, especially before challenging situations. These complaints can be genuine even without an obvious physical cause.
Common symptoms include:
frequent headaches
recurring stomachaches
changes in appetite
muscle tension
Pay attention to when your child complains about feeling unwell. For example, stomachaches that occur frequently before school but improve on weekends may suggest school-related stress. If symptoms persist or recur, consult a pediatrician to rule out medical causes.
Difficulty Concentrating at School
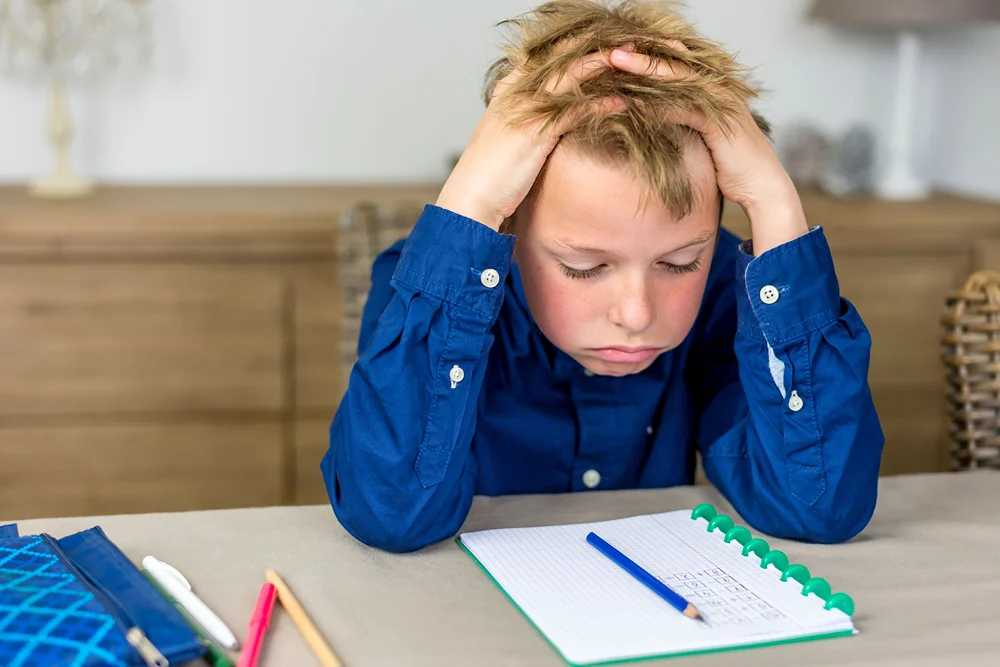
Stress can make it difficult for children to focus on lessons and complete assignments. You might notice that they take longer to complete their homework. Teachers may also report that your child seems distracted or less engaged in classroom discussions.
Rather than assuming they’re losing interest in school, consider whether something else is occupying their thoughts. Emotional concerns can interfere with learning, even when children want to succeed. Talking with their teacher may provide valuable insight into recent changes.
When School Pressure Becomes Overwhelming
Academic expectations can become stressful when kids feel they must perform perfectly. Upcoming tests or difficult subjects may leave them feeling unprepared. Social challenges at school can make these pressures even harder to manage. Ask your child which parts of the school day feel most difficult. Once you understand what’s troubling them, work together to find practical ways to reduce that pressure. For example, you could break assignments into smaller tasks or speak with their teacher.
Repetitive Self-Soothing Behaviors
Some children turn to familiar habits when they’re feeling overwhelmed. For example, thumb sucking or nail biting may provide comfort during uncomfortable moments. An increase in self-soothing behaviors may signal that your child is experiencing stress.
Instead of focusing solely on the habit, notice when it occurs. Does your child do it more often before school or in unfamiliar situations? These patterns can reveal whether stress contributes to the behavior.
Understanding Why Habits Develop
Repetitive behaviors can also occur when children feel bored or tired. Over time, certain actions may become automatic rather than deliberate responses to stress. Parents can explore ways to help kids replace stressful behaviors with more constructive coping strategies. Identifying the circumstances behind these habits makes it easier to respond patiently.
Withdrawal From Friends and Activities
A child experiencing stress may lose interest in activities they once enjoyed. Perhaps they stop asking to visit friends or suddenly resist attending an extracurricular program. They might also prefer spending more time alone after school.
These changes can be confusing, especially when your child doesn’t explain what’s wrong. Rather than pressuring them to participate, ask gentle questions about their experiences. Their answers may reveal worries about social relationships or other challenges.
Distinguishing Stress From Normal Preferences
Children naturally develop new interests and occasionally need time alone. A preference for quieter activities doesn’t automatically indicate a problem. However, sudden withdrawal from several favorite activities may suggest something is bothering them.
How Parents Can Offer Support
When children show signs of stress, supportive conversations can make a meaningful difference. Instead of immediately trying to solve every problem, give your child opportunities to express their feelings. Kids aren’t always comfortable discussing their worries directly. Sometimes, talking while taking a walk, preparing dinner, or driving home from school feels less intimidating.
Consider these strategies to support your child:
Ask open-ended questions about their day.
Maintain predictable mealtimes and bedtimes.
Encourage enjoyable physical or creative activities.
Communicate with teachers about school-related concerns.
Parents can also help children manage difficult emotions by teaching them how to recognize and express what they’re feeling. Encourage your child to name specific emotions, such as frustration or nervousness, rather than simply saying they feel bad. You can also practice calming techniques together, such as taking slow breaths or stepping away from a stressful situation for a few minutes.
When To Seek Professional Help
Some stress reactions improve with reassurance and home adjustments. However, persistent symptoms may require additional support. If your child’s behavior worsens or begins interfering with daily activities, consult their pediatrician. A qualified professional can assess their needs and recommend appropriate next steps.
Every child responds to challenges differently, so recognizing stress requires patience and observation. Rather than treating an isolated behavior as a warning sign, consider how your child’s habits and emotions change over time. Communicate clearly and respond with understanding instead of frustration. With steady reassurance and appropriate support, children can develop greater confidence in handling life’s challenges.