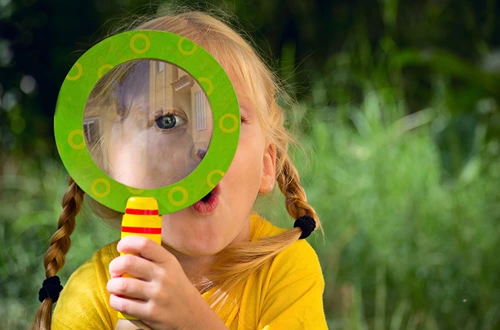
Top 10 Ways to Make Moving Less Stressful for Children

Parents pushing their child in a cardboard box.

Moving ranks high on the stress scale for families. Kids feel this pressure even more than we think. They’re leaving behind friends, teachers, and every corner they know. But parents can do plenty to smooth things over. Small actions make a real difference. These ten strategies help children handle the big change without falling apart.

Start Conversations Early and Keep Them Honest

Tell your kids about the move once plans are solid. They need time to wrap their heads around it. Springing it on them last minute just makes everything worse.

Be straight with them about what’s happening. Skip the sugar coating. Some children will worry about making new friends. Others stress about changing schools. Listen to what they’re actually saying instead of brushing it off.

Talk about the good stuff too. Maybe they’ll get a bigger room. Perhaps there’s a pool nearby. Give them real things to get excited about.

Involve Children in Planning and Decisions

Let kids have a say in how things go. They can pick colors for their new bedroom walls. Take them furniture shopping if you’re buying new pieces.

Show them pictures of the house before you move. Walk through videos together if you have them. Point out the backyard or the park down the street. Seeing the place helps them imagine living there.

Make a folder they can keep with info about the new area. Toss in maps, school brochures, photos of local spots. Having something physical to look at helps when they feel worried.

Let Professionals Handle the Heavy Work

Your stress level directly affects your kids. When you’re frazzled, they pick up on it fast. Professional movers take the physical work off your plate. Local movers pack everything up, load it safely, and get it to your new place without you throwing out your back.

This frees you up for the important stuff. You can comfort your nervous seven-year-old instead of hauling boxes. You stay calm, they stay calmer. Pretty simple math.

Plus, nobody ends up in urgent care with a pulled muscle. The last thing your family needs is an injury derailing everything.

Give Children Control Over Their Belongings

Hand your kids some boxes and let them pack their own stuff. Give them markers to draw on the boxes. Suddenly packing becomes way less awful.

Let them choose what matters most right now:

  • Their favorite stuffed animal rides in the car
  • Special toys stay within reach
  • Books they’re reading come along
  • Photos from their room get protected

Older kids can make lists of what they’re packing. Little ones just need to pick their must-haves.

Never toss their things without asking first. Finding out their beloved toy vanished breaks trust instantly. Go through stuff together. Respect what they care about even if it seems silly to you.

A child helps his parents unpack moving boxes in their new home.

Keep Familiar Routines During the Transition

Kids run on routine. Breakfast, school, bedtime. They need that structure when everything else is chaos. Keep meal and sleep times the same. The National Association for the Education of Young Children backs this up. Routines help children feel secure during transitions and big changes.

Pack one bag with their normal nighttime and morning stuff. Toothbrush, pajamas, favorite bedtime book. These everyday items anchor them when the world feels upside down.

Don’t pull them out of activities early unless you absolutely have to. Stopping soccer or piano lessons weeks before the move just adds to their losses. Let them finish out the season or month.

Create a Special First Night Box

Pack a box for each kid with everything they need that first night. Label it super clearly. Pack this one last so it’s easy to grab first.

Each box should have:

  • Clean pajamas and tomorrow’s outfit
  • Toothbrush and any medicines they take
  • Their comfort item or favorite toy
  • Books they like at bedtime
  • Snacks they enjoy
  • Maybe a small new toy as a surprise

Consider this box a peace offering. It says you thought about what they’d need. That matters more than you’d think.

Keep these boxes in your car, not the moving truck. You want them instantly without digging through everything else. Fast access means faster settling in.

Arrange Childcare for Moving Day When Possible

Moving day gets wild. Movers everywhere, boxes stacked up, constant noise and movement. Young kids often just get overwhelmed by all of it.

Call in grandparents or close friends if you can. Having the kids elsewhere keeps them safe and happy. You can focus on directing traffic without worrying about little feet underfoot.

No childcare available? Set up a quiet corner away from the action. Load it with activities. Coloring books work. Movies on a tablet help. Check in often but keep them out of the main zones.

Older kids might want to help with easy tasks. Let them label boxes or put stickers on furniture. Just keep them away from doorways and heavy loads.

Turn Moving Day into Something Positive

Stop treating moving day like a disaster waiting to happen. Ease anxiety by making it fun instead. Create a playlist of songs everyone likes. Let kids wear whatever’s comfortable, even if that means pajamas all day.

Take photos as things happen. Snap pics of them in the empty old house. Get shots at the new place. These become memories they can look back on proudly.

Order their favorite food for dinner that night. Nobody wants to cook after moving all day. Pizza or tacos beat trying to find pots and pans. Easy wins count.

A girl sits in a cardboard box shooting a nerf gun.

Set Up Children’s Rooms First

Your kids’ bedrooms come before anything else. Get those spaces ready first. Familiar surroundings help them sleep better that first night. Consistent sleep patterns and spaces matter for kids handling stress.

Try to set up furniture like their old room if you can. Hang up the same posters right away. Use their regular sheets and blankets. Small familiar touches provide comfort in a strange place.

Then step back and let them organize their own stuff. Don’t swoop in fixing everything to look perfect. Their room, their choices. That sense of ownership helps them adjust faster.

Help Them Settle into the New Community

Get out and explore within those first few days. Walk around the neighborhood together. Find the nearest park and playground. Show them where the library is. Point out the ice cream place or pizza shop.

Include them in setting up shared spaces too. Ask where they think the couch should go. Get their input on hanging pictures. Making these choices together shows this home belongs to all of you.

Meet neighbors with kids around the same ages. Set up some casual hangouts or playdates soon. New friendships ease the transition better than anything else you can do. Social connections beat perfect room setups every time.

Share This Article

How to Build Strong Learning Habits for Children With Delays

A boy looking through a box of learning materials in class.

Learning is not always simple for children. Even basic school routines can feel overwhelming for many families. It takes time, patience, and a lot of support. When a child has developmental delays, the challenge becomes even bigger.

Parents try everything—new learning toys, different routines, school pressure, and endless advice. Yet progress still feels slow. It is easy to wonder if your child will keep up or if you are doing enough to help.

Developmental delays do not mean a child cannot learn. They simply need a different way to learn. A different rhythm. A different kind of support. Strong learning habits grow when children feel understood, safe, and guided at their own pace.

If you are looking for simple ideas to support that journey, this article is for you. Read on to find helpful ways to build learning habits for children!

Understanding Developmental Delays

Developmental delays are more common than many parents realize. These delays can show up in different ways and at different ages. Some children need more time with speech. Others may struggle with social interaction, movement, or problem-solving. A delay does not mean a child cannot learn. It simply means they need a different approach and more guided support.

Common areas where delays appear:

  • Communication and speech
  • Motor skills and coordination
  • Behavior and emotional development
  • Learning and problem-solving
  • Social interaction

Understanding the delay is the first step. In the next step, parents start searching for how to help a child with developmental delay and soon discover that professional guidance makes a big difference. Specialists understand how children grow and which skills need extra attention. Their support may include:

  • Speech or language therapy
  • Sensory and behavior therapy
  • Early learning intervention
  • Emotional and developmental guidance

Service providers like Cultivate BHE help parents build a clear plan and understand what their child needs. They use structured strategies, assessments, and expert programs that support communication, social skills, and learning habits. Professional help gives direction, reduces stress for parents, and creates progress that is easier to see and maintain.

Build Learning Through Routine and Structure

Children grow when life feels predictable. A routine creates comfort because the child knows what comes next. This helps reduce anxiety and improve attention. Simple routines can be added to the day, even if schedules are busy.

Helpful ways to build routine:

  • Use visual schedules and charts
  • Break tasks into smaller steps
  • Give gentle reminders
  • Keep learning activities short

Structure gives children more confidence. It teaches them how to follow directions, finish tasks, and stay focused. What seems like a small moment at home—reading time, structured play, or daily practice—helps build long-term habits.

Consistency is more important than perfection. A few minutes every day often works better than long sessions once in a while.

Create a Supportive Learning Environment

A calm home makes learning easier. When a child feels safe, their mind becomes open to growth. Parents can create a learning-friendly space at home without changing everything.

Examples include:

  • Soft lighting or natural light
  • Quiet corners for reading or play
  • Removing distractions
  • Easy access to books, puzzles, or educational toys
  • Using positive words during challenges

A supportive environment includes emotional safety. Praise small steps. Applaud effort. Allow trial and error. Children need time to learn, and they learn faster when they feel understood.

Use Play, Movement, and Interaction

Play is not separate from learning—play is learning. Children connect ideas through movement, touch, and imagination. These activities help build language skills, problem-solving, and social ability.

Engaging activities include:

  • Pretend play and storytelling
  • Simple puzzles
  • Music and rhythm activities
  • Building blocks or creative toys
  • Sensory activities like water, sand, or clay

Play encourages children to explore. When learning feels like play, children stay engaged for longer and feel more confident.

Movement also supports brain development. Outdoor time, walks, and light physical activity improve attention and energy.

Work With Professionals and Maintain Long-Term Consistency

Parents do not have to do everything alone. Professional support guides the journey and helps avoid confusion or delays in treatment. Therapists, special educators, pediatric experts, and school support teams offer clear strategies and goals.

Professional guidance also helps:

  • Set realistic expectations
  • Track progress over time
  • Teach new communication techniques
  • Create age-appropriate learning plans
  • Support emotional and social development

Parents can then continue these methods at home. The strongest learning habits are built when everyone works together—at home, school, and with professionals.

Conclusion

Every child learns in a different way. Growth may take time, but small habits support big changes. Children improve when routines are clear, when the home environment encourages learning, and when play becomes part of daily life. Professional guidance adds direction and strength to this journey. What matters most is consistency, patience, and support.

Learning habits do not appear overnight. They develop slowly. With the right approach, every child can gain skills, confidence, and independence at their own pace.

Share This Article

Sunscreen 101: Protecting Your Skin Every Day

The bright sun shines in an orange sky.

Sunscreen is one of the most effective ways to protect your skin from the harmful effects of the sun. Ultraviolet (UV) rays, even on cloudy days, can cause sunburn, premature aging, and increase the risk of skin cancer. Using sunscreen daily helps shield your skin from these risks while keeping it healthy and radiant.

Many people think sunscreen is only necessary for summer or beach trips, but UV exposure occurs year-round. Regular application of sunscreen can prevent sun damage that accumulates over time, which often shows up as wrinkles, dark spots, or uneven skin tone.

Types of Sunscreen

Sunscreens generally fall into two categories: chemical and physical.

Chemical Sunscreens

Chemical sunscreens absorb UV radiation and convert it into heat, preventing it from penetrating the skin. Ingredients like avobenzone, octocrylene, and oxybenzone are common in this type. They are usually lightweight and suitable for daily use under makeup.

Physical Sunscreens

Physical sunscreens, also called mineral sunscreens, contain zinc oxide or titanium dioxide. They act as a barrier, reflecting UV rays away from the skin. These sunscreens are often recommended for sensitive skin as they are less likely to cause irritation.

Choosing the Right SPF

SPF, or Sun Protection Factor, indicates the level of protection against UVB rays, which are the primary cause of sunburn. An SPF 30 blocks approximately 97% of UVB rays, while SPF 50 blocks about 98%. Higher SPF offers slightly more protection, but no sunscreen can block 100% of UV rays.

For everyday activities, dermatologists recommend at least SPF 30. For extended outdoor exposure, such as hiking or beach days, SPF 50 or higher is advisable.

How to Apply Sunscreen Correctly

Proper application is key to effective sun protection. Follow these steps:

  • Apply sunscreen 15–30 minutes before going outdoors to allow it to absorb.
  • Use a generous amount; most adults need about one teaspoon for the face and neck, and a shot-glass amount for the entire body.
  • Reapply every two hours, or more often if swimming, sweating, or towel-drying.
  • Don’t forget often-missed areas like ears, back of the neck, hands, and tops of feet.

Common Myths About Sunscreen

Myth 1: Dark skin doesn’t need sunscreen

Research from MD Anderson Cancer Center confirms that while dark skin has more melanin, it is not immune to UV damage. Their dermatology experts explain that people with darker skin are less likely to get skin cancer, but they are still at risk, and dark skin can still burn.

Myth 2: Sunscreen is only for sunny days

According to the WHO, even on overcast or hazy days, UV radiation still gets through. In fact, thin clouds can scatter UV light and sometimes even slightly increase the exposure. So yes — you still need protection, because invisible UV rays can still harm your skin when it’s cloudy.

Myth 3: One application is enough

Sunscreen wears off over time, especially with sweat or water exposure. Reapplication is necessary for continuous protection.

Tips for Everyday Sun Safety

Sunscreen works best when combined with other sun safety habits:

  • Seek shade during peak UV hours, typically between 10 a.m. and 4 p.m.
  • Wear protective clothing, hats, and sunglasses.
  • Be cautious near reflective surfaces like water, sand, and snow.

Conclusion

Sunscreen is a simple yet powerful tool to maintain healthy skin. By choosing the right type, applying it correctly, and combining it with other sun-safe habits, you can enjoy the outdoors without compromising your skin’s health. Making sunscreen a part of your daily routine is an investment in both your appearance and long-term well-being.

Share This Article

From Novice to Artist: 5 Pro Tips to Master Your Paint by Numbers Project

A young woman sit in a chair and paints.

Paint by numbers has experienced a massive resurgence across the UK, evolving from a nostalgic childhood pastime into a respected method for mindfulness and artistic expression. It offers a structured way to create stunning imagery without the daunting prospect of facing a blank canvas.

However, there is a distinct difference between simply filling in gaps and creating a piece of art that looks professionally finished.

If you are looking to transition from a hobbyist to a skilled painter, the technique matters just as much as the image you choose. Whether you are working on a standard landscape or a sentimental custom paint by numbers art kit, adopting a few advanced strategies can transform your final result from a simple colouring exercise into a masterpiece worth framing.

Here are five essential tips to elevate your skills from beginner to advanced.

1. The “Light to Dark” Philosophy

One of the most common pitfalls for beginners is attacking the canvas randomly. Experienced artists understand that the order of application is crucial. Always begin with your lightest hues before moving on to the darker tones.

The reasoning is practical: acrylic paint is generally opaque, but dark colours are far more dominant. If you accidentally paint over a border with a pale cream or yellow, covering it later with a deep blue or black is effortless. Conversely, trying to hide a dark smudge with white paint often requires multiple thick layers, which can leave an uneven texture. By starting light, you ensure a forgiving base that keeps your canvas looking crisp.

2. Curate Your Studio Space

You cannot produce high-quality work in a cluttered, dimly lit environment. Professional artists treat their workspace with respect, and you should too. Set up a dedicated area with a flat, stable surface and, crucially, excellent lighting. Natural daylight is ideal for colour accuracy, but if you are painting in the evening, a daylight-simulation lamp is a worthwhile investment to prevent eye strain.

Organise your workspace efficiently. Keep your water pot, paper towels, and brushes on your dominant side to avoid reaching across your wet painting. If you are using a personalised kit based on a photo, keep the original reference image propped up nearby. This allows you to compare the nuances of the image rather than relying solely on the numbered guide.

3. Master the Art of Layering

A tell-tale sign of a beginner’s painting is the visibility of the numbers or grid lines through the paint. To achieve a rich, professional finish, avoid the temptation to apply one thick glob of paint. Instead, embrace the technique of layering.

Apply a thin, even coat first and allow it to dry completely. If the number is still visible, apply a second coat. This method creates a smoother surface and ensures the colours appear vibrant and solid. It is particularly important for lighter shades, which naturally have less pigment density. Patience is key here; rushing to add a second coat whilst the first is damp will only drag the paint and create a streaky finish.

4. Brush Hygiene and Maintenance

Your tools are the extension of your hand, and their condition dictates the quality of your strokes. Acrylic paint dries rapidly and becomes water-resistant once set. If paint creates a build-up at the “ferrule” (the metal part connecting the bristles to the handle), the bristles will splay, making precision work impossible.

Get into the habit of rinsing your brush immediately after finishing a colour or even during long sessions with the same colour. Never leave brushes resting bristles-down in a water pot, as this bends the tip. By maintaining a sharp point on your brushes, you ensure you can tackle even the most intricate sections of your canvas with confidence.

5. Softening the Edges (Blurring)

Strictly following the lines creates a “mosaic” effect, which is classic for paint by numbers. However, to achieve a more realistic, painterly look—especially for portraits or clouds—you may want to soften the transitions between colours.

This is an advanced technique where you slightly blend two wet colours where they meet on the canvas. Alternatively, you can use a technique called “zig-zagging” with a very dry brush to break up the hard line between two dry sections. This is particularly effective when working on custom kits involving faces or animal fur, where sharp lines rarely exist in nature.

Conclusion

Becoming an advanced painter is not about talent; it is about patience and process. By organising your space, caring for your tools, and thinking critically about how you layer your colours, you can produce a painting that belies its numbered origins. Whether you are capturing a family memory or a scenic view, these tips will ensure your art stands the test of time.

Related Reading

Practical fun tips for teaching art to kids.

Share This Article